Installing Low-Voltage Landscape Lighting Easily
The term ‘low-voltage landscape lighting’ refers to a versatile and appealing form of lighting that enhances the aesthetic appeal and safety of outdoor spaces. This lighting style employs light fixtures that operate on a low-voltage power supply, typically 12 volts, in contrast to the standard residential voltage of 120 volts. With its captivating dance between light and shadow, low-voltage landscape lighting can evoke an array of moods while showcasing your home’s exterior and landscaping in novel, enchanting ways.
Understanding Low-Voltage Landscape Lighting
Low-voltage landscape lighting can transform your outdoor space into an oasis of tranquility or a vibrant venue for social gatherings. It affords homeowners the ability to conduct a symphony of light across their property with aplomb.
From delicate path markers that guide visitors along winding garden paths to powerful spotlights that accentuate architectural features or specimen trees, this type of lighting offers unparalleled scope for creative expression. In addition to its aesthetic merits, low-voltage landscape lighting imparts numerous practical benefits.
Firstly, by emitting less intense heat than regular household lights, these systems are safer for households with children or pets who may inadvertently come into contact with them. Secondly, they consume significantly less energy – as little as one-third – compared to conventional high-voltage systems, thus making them an economical choice in the long run.
The Benefits of Installing Low-Voltage Landscape Lighting
Besides casting your residence in a flattering light after sundown and enhancing its architectural design and landscaping features, installing low-voltage landscape lights also increases the functionality of outdoor spaces well into the night hours. Whether you wish to host evening barbecues on summer nights or enjoy peaceful winter evenings under the stars wrapped up cozily by your fire pit area, these lights extend your home’s livable space to the great outdoors.
The added luminosity provided by this lighting system also makes paths and driveways safer to navigate, reducing the risk of trips and falls. Furthermore, it serves as an effective deterrent for trespassers while providing added security for your property.
An Overview of the Installation Process
Installing a low-voltage landscape lighting system involves several crucial steps. These include understanding the various types of lights available and their specific uses, planning your layout based on your desired outcomes, gathering necessary tools and materials, setting up the transformer, installing light fixtures, and connecting them through a wiring system. This post will elucidate each step in detail to enable you to install this incredibly beneficial lighting system in your landscape with confidence.
Although the process might appear daunting at first glance, with careful preparation and adherence to detailed instructions, even a novice do-it-yourself enthusiast can successfully install low-voltage landscape lights with relative ease. As we journey together through this guide, shining a light on each aspect of installation, you’ll find that what once seemed mysterious or technical transforms into an achievable goal that’s within your reach.
Unveiling the Mysteries of Low-Voltage Landscape Lighting
Understanding low-voltage landscape lighting does not require an electrical engineering degree. It’s simply a matter of getting to grips with a few fundamental concepts. First and foremost, low-voltage landscape lighting operates at 12 volts, significantly less than the standard household current of 120 volts.

This makes it safer for outdoor use, particularly in areas exposed to moisture or heavy weathering. The reduced voltage also allows for more energy-efficient operation and more flexibility in design choices.
It is perfect for highlighting architectural features, illuminating walking paths, or setting a desired mood in outdoor living spaces. The system usually requires three key components: a transformer to lower the voltage from 120 volts to 12 volts, wiring or cables to distribute power among the lights, and light fixtures themselves.
A Palette of Lighting Options: Types of Low-Voltage Landscape Lights
There are a myriad of options when it comes to types of low-voltage landscape lights; each type is designed with a specific purpose in mind.
Path lights are generally mounted on stakes and arranged along walkways or borders. They cast light downward, creating pools that guide your way safely during nightfall. Path lights contribute not only towards safety but also add an aesthetic appeal by marking perimeters and highlighting ground-level plants.
Spotlights are versatile performers that can be used creatively for throwing focused beams on particular areas, such as statues, trees, or house facades. Their ability to create dramatic effects by contrasting light and shadows cannot be overstated.
On the other hand, floodlights provide broad illumination covering large areas like driveways or patios while maintaining an unobtrusive presence themselves. Well lights are installed into holes dug into the ground so that they’re at level with its surface, making them almost invisible during daylight hours yet providing an uplifting effect on objects directly above them after dusk.
Nuts and Bolts: Key Components of a Low-Voltage Landscape Lighting System
The heart of a low-voltage landscape lighting system is the transformer. This device reduces the standard 120 volts coming from your home’s electrical system down to 12 volts. Transformers come in various wattages, generally ranging from 100 to 600 watts. The total wattage of all the lights connected to a transformer should not exceed its capacity.
Wiring or cables are akin to veins in our bodies, carrying life-giving power to each light fixture. For low-voltage systems, 12 or 16-gauge cable is typically used and can be buried just below the surface or hidden under foliage.

Fixtures or lights are what you see and appreciate most in any lighting system. Depending on their design, they can contribute visually during daylight hours while performing their primary function after sunset.
They come in various styles, sizes, and materials (such as plastic, aluminum, copper, or stainless steel), each with its own unique set of advantages and disadvantages. Understanding how different types of lights work and interact with other components can help you design an optimal landscape lighting setup that not only enhances your property’s appeal but also adds layers of security by illuminating otherwise dark areas.
The Preparatory Pathway: Getting Ready for Installation
Before embarking on the journey of installing low-voltage landscape lighting, one must indulge in proper preparation. This phase is paramount as it navigates the entire setup process and ensures that the result is not just satisfactory but spectacular.
Shedding Light on Purpose: Determining Your Lighting Objectives
A clear understanding of the purpose and desired effect of your lighting system forms the backbone of your preparatory process. Each corner or feature in your landscape could have a different story to tell, and it’s important to identify how you want these stories illuminated.
Crafting an Aura: The Art of Ambiance Creation
If your aim is ambiance creation, consider a gentle yet consistent light source that bathes your area with warmth without being overly dramatic. You might want soft lights around sitting areas, alcoves, or flowerbeds; these can create an inviting glow that enhances coziness and serenity.
Guardians in Glow: Enhancing Security through Strategic Lighting
For security enhancement purposes, bright lights combined with motion sensors can be employed at entranceways or darker corners. This not only discourages potential intruders but also ensures safe navigation for residents during nighttime hours.
Spotlighting Beauty: Highlighting Architectural Features
Highlighting features such as statues, water bodies, or architectural elements require focused lights like spotlights or well lights. These draw attention towards these points, thereby making them stand out amidst their surroundings.
Picking Your Stars: Selecting Proper Light Fixtures
Once you’ve identified your objectives, selecting proper fixtures becomes easier. Path lights are ideal for outlining walkways, while floodlights can illuminate larger areas effectively. Spotlights serve best when used to accentuate specific elements, whereas well lights work great for under-lighting features.
Strategizing Luminescence: Planning Your Layout and Light Positions
Planning your layout is akin to painting a canvas – you need a vision, and the lights are your colors. Start by marking out where you want your lights positioned based on the purpose they serve. Ensure that they are adequately spaced out and not causing any light pollution or unnecessary glare.
Place your fixtures in such a way that they illuminate their intended areas without directly shining into people’s eyes. For instance, path lights should be installed at an angle such that they light up the path without blinding those walking on it.
Proper preparation not only makes the installation process smoother but also helps in achieving an aesthetic and functional lighting system. As with any artistic endeavor, patience, creativity, and careful thought will yield truly enlightening results.
Lighting Equipment: Tools Required for Installation
The undertaking of any task requires not only skill but also the right tools. The installation of low-voltage landscape lighting is no different. First and foremost, you’ll need a set of wire cutters and strippers. These will be essential for cutting your wiring to the appropriate lengths and exposing the necessary amount of wire to make the connections.
Next, consider investing in a quality voltage meter. This indispensable tool can ensure that your transformer is outputting the correct voltage, which is crucial to the efficient function of your lighting system. It can also be used to troubleshoot any potential issues that may arise throughout your system.
A trenching shovel or garden spade will come in handy when it’s time to dig trenches for your wiring and holes for any fixtures that need to be secured into the ground. A drill may also be necessary if you’re installing lights onto decks or other wooden structures.
Don’t forget about personal protective equipment (PPE). This includes safety glasses and gloves, which will protect you from potentially harmful materials or accidents during installation.
Laying Foundations: Materials Needed for Installation
Choosing high-quality materials can greatly affect the longevity and performance of your landscape lighting system. When choosing wires for connecting your fixtures, opt for a 12- or 14-gauge low-voltage cable designed specifically for outdoor use. These cables are durable enough to withstand weather conditions and are capable of delivering adequate power to all of your lights.
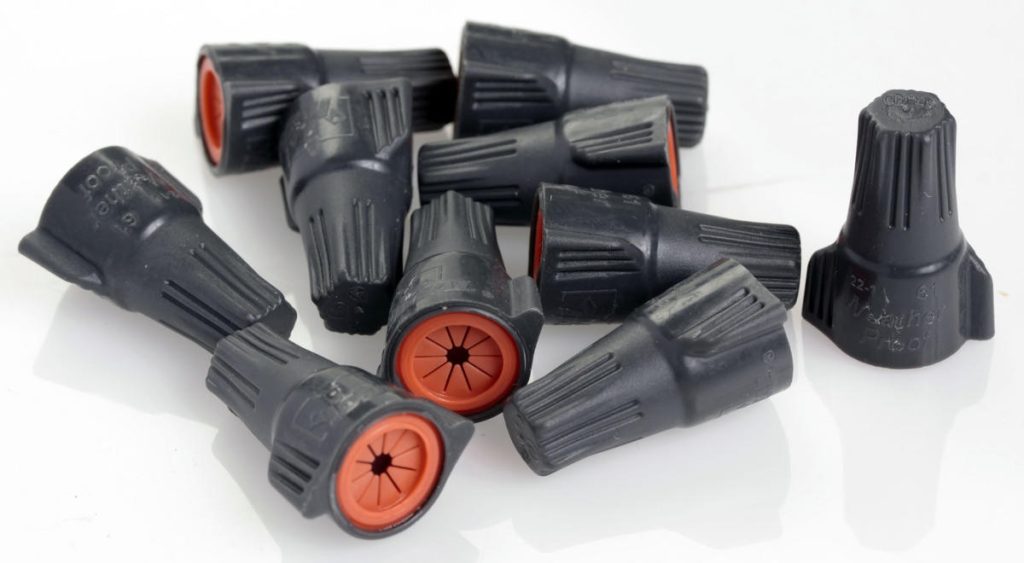
Next, it’s important to consider connectors. The connectors’ primary function is creating secure connections between wires, ensuring consistent electrical flow throughout the circuitry of our landscape lighting setup. Waterproof twist-on wire connectors are often recommended as they provide strong connections while shielding them from moisture ingress.
The transformer serves as an essential element in our low-voltage landscape lighting setup since it converts standard household electricity to a safer low-voltage current ideal for landscape lighting. The transformer’s capacity should be chosen based on the total wattage of your light fixtures.
The heart of your system is the light fixtures themselves. Choosing high-quality, durable fixtures that are designed for outdoor use will ensure that your lights continue to shine brightly for years to come.
Options range from path lights and spotlights to floodlights and well lights, each serving a specific purpose within the lighting design. You will need stakes or bases for your fixtures (depending on the type), as well as any additional mounting hardware required if you’re installing lights onto existing structures such as deck posts or walls.
Guiding Lights: A Step-by-Step Installation of Low-Voltage Landscape Lighting
The Power Behind the Beauty: Setting Up the Transformer
The transformer is the heart of your low-voltage landscape lighting system, supplying power to each individual fixture. Select a location for this crucial component that is close to a GFCI electrical outlet and can be easily concealed, such as behind shrubbery or nestled amongst rocks. Consider using an outdoor unit with a built-in timer or photocell that automatically turns lights on at dusk and off at dawn for added convenience.
Once you’ve chosen the location, mount the transformer to a post or wall approximately one foot above ground level to avoid potential water damage. Ensure it’s secure before proceeding. Now, plug it into your nearby GFCI outlet. Remember to keep all electrical connections dry and off the ground; use a waterproof shield if necessary.
Shedding Light on Darkness: Installing the Light Fixtures
Now that power has been established via the transformer, it’s time to install your selected light fixtures. Start by digging holes or trenches (depending on whether you’ve chosen stake-mounted lights or in-ground well lights) in your predetermined locations based on your landscape lighting design plan.
Carefully attach each fixture to its respective stake or base, being mindful not to touch any halogen bulbs with bare hands as oils can cause premature burnout. Securely place these fixtures into their holes and adjust angles as necessary for optimal lighting.
Connecting these fixtures to your wiring system involves stripping ends of low-voltage cables and threading them through cable connectors supplied with each fixture. Ensure all wires are securely connected before moving onto running main cables.
Wired for Success: Running and Connecting Wires
Laying out wires along your planned path may seem daunting, but fear not; this stage is easier than it appears. Begin by running a main trunk line from the transformer to your furthest light, then tie off that line to each subsequent fixture, creating a branched network of lights.
When connecting wires to each fixture, ensure you match wire polarities; this implies that the ribbed side of your cable connects with the silver screw on your fixture. Secure these connections using silicon-filled wire nuts or waterproof grease caps for maximum longevity and safety.
Your final task is checking your connections with a volt-ohm meter. If all connections are sound and voltage reads as expected, you’ve successfully set up your low-voltage landscape lighting system!
Conclusion: How to Install Low-Voltage Landscape Lighting?
Creating ambiance in your outdoor space through low-voltage landscape lighting can seem like an intricate task, but remember that every endeavor starts small and grows gradually with time, experience, and knowledge. Now, beautifully lit at nightfall, you’ve not only enhanced the aesthetics of your property but also improved its safety and functionality. Your diligence in design planning and careful installation has yielded an enchanting nightscape that is sure to leave visitors marveling at its sheer splendor!
You may also be interested in the following posts: