Landscape Lighting: An Enlightening Overview
Landscape lighting, at its core, is a creative and practical method of augmenting the allure of your exterior space. It involves the strategic placement of light fixtures within your outdoor environment to highlight its inherent beauty.
From bathing walkways in a welcoming glow to spotlighting unique architectural features, landscape lighting provides an avenue for homeowners to express their personal style while improving functionality and safety. While many consider landscape lighting as mere illumination tools for paths or patios, it extends beyond these conventional applications.
Landscape lighting can include various types such as path lights, spotlights, and floodlights, among others – each serving a unique purpose yet collectively working towards one goal – enhancing the visual appeal and usability of outdoor areas under the cloak of darkness. The efficacy of landscape lighting lies in its ability to distill drama from mundanity.
It paints an enchanting nighttime tableau that not only captures attention but also fuels imagination. A well-lit landscape allows you to extend your living space beyond the confines of your home, creating a seamless integration between indoor comfort and outdoor conviviality.
The Arboreal Appeal: Unveiling the Benefits of Tree Lighting
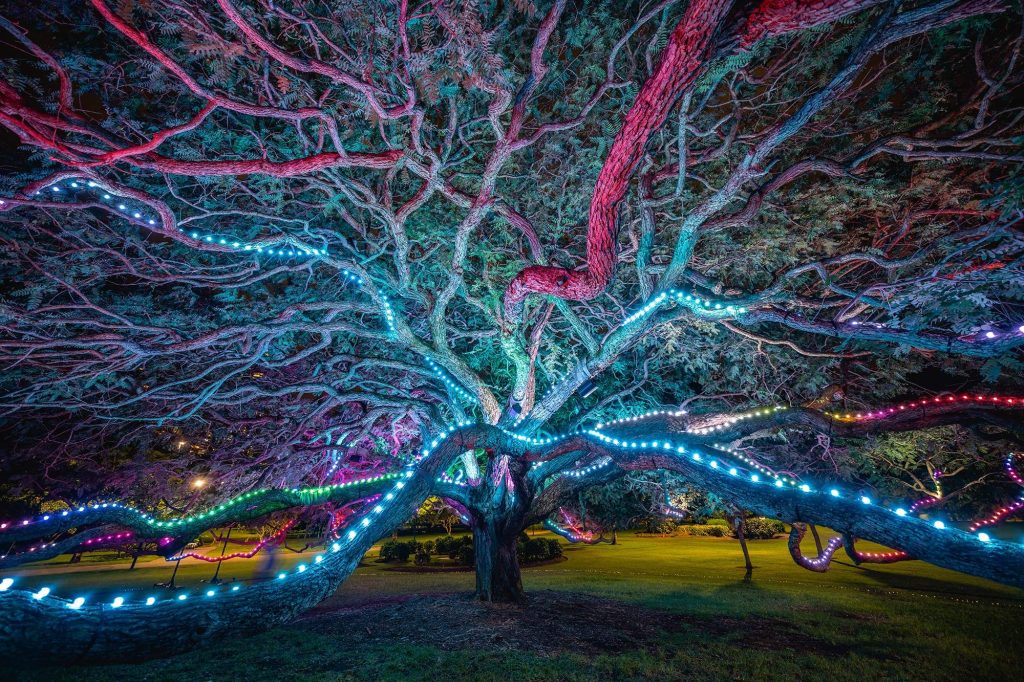
A tree is no less than an arboreal sculpture standing tall against the test of time. Installing landscape lighting in trees enhances this natural artwork by adding depth and dimension to your yard’s nocturnal aesthetic.
Tree lights cast intriguing shadows that dance with the wind, bestowing an ethereal quality upon your landscape that flat ground-level lights cannot achieve. Beyond aesthetics, tree lighting serves several practical purposes as well.

They provide enhanced visibility for navigation during nighttime hours, preventing any potential accidents due to unknown obstacles hidden in shadows. Moreover, tree lights are instrumental in dissuading pests or potential intruders by eliminating dark spots that could serve as hiding places.
Tree lighting also helps in accentuating the unique features of different tree species, be it the gnarled beauty of an ancient oak or the whimsical charm of a willow. It’s like having your private constellation twinkling amongst leaves, creating a magical, surreal ambiance that truly elevates outdoor living.
Installation Insights: A Sneak Peek into the Process
Installing landscape lighting in trees is more than just affixing fixtures to branches. It entails careful planning, understanding the basic tenets of lighting design, selecting appropriate fixtures, and undertaking safe and effective installation procedures. The process begins with identifying suitable trees for lighting based on their type, size, and location in your yard.
You would then determine the kind of mood you’d wish to set with your tree lights – whether you prefer soft romantic lighting or a dramatic spotlight effect. This decision would influence your choice of light fixtures.
Next comes preparation for installation, which involves gathering necessary tools and materials as well as understanding electrical requirements for outdoor lighting. The step-by-step installation process can then commence, which includes positioning light fixtures optimally on trees, running wiring from the power source to each fixture, and connecting them safely to the power source.
Post-installation adjustments take place wherein each light’s position might be fine-tuned to create desired effects before finally testing out your new tree lights. Throughout this post we’ll delve deeper into each step, providing detailed instructions accompanied by expert tips, ensuring that at its conclusion you are equipped with all necessary knowledge to embark upon this enlightening journey towards creating an enticing nighttime spectacle in your garden!
Understanding the Basics of Landscape Lighting
Exploring the Variety of Landscape Lighting Options
Landscape lighting comes in a plethora of styles and designs, each fulfilling a unique purpose. Some common types include spotlights, path lights, floodlights, and deck lights. Spotlights are utilized to highlight specific features within your landscape, such as trees or architectural elements. They emit an intense beam of light in one specific direction for dramatic emphasis.
Path lights serve to illuminate pathways and walkways for aesthetic appeal as well as safety purposes. They provide gentle lighting along routes that people frequently traverse during dark hours. Floodlights offer intense illumination on a broad scale and are ideal for security purposes or lighting large areas like driveways or patios.
Deck lights are primarily used to accentuate decks or outdoor seating areas. These can be installed into the deck floor itself or mounted on railings and posts to provide ambient light for entertainment spaces.
The Integral Role of Trees in Landscape Lighting Design
Trees play a vital role in elevating the attractiveness and functionality of landscape lighting design. By adorning trees with carefully placed fixtures, it’s possible to create dynamic plays of light and shadow that bring depth, dimensionality, and drama to your outdoor space after sundown.

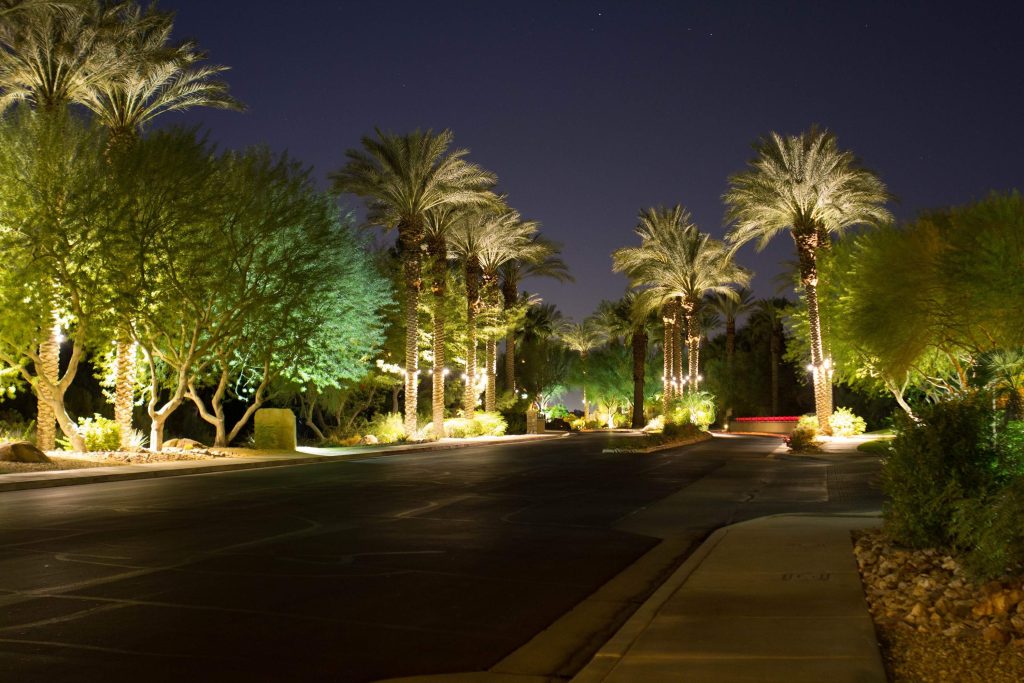
Well-lit trees stand out as visual anchors around which other landscape elements revolve; their imposing stature is enhanced by the interplay between natural foliage and artificial illumination. The upward glow from tree-mounted lights also provides ambient lighting that softly illuminates surrounding areas.
Moreover, trees can function as natural screens upon which lights cast intricate silhouettes – an effect particularly striking when shaped by leaves fluttering gently in the breeze. This lends a sense of motion and vitality to your nocturnal landscape tableau that static lighting setups simply cannot rival.
Safety Precautions During Tree Lighting Installations
While installing lights in trees, safety always remains paramount. The first step to ensuring safe installation is selecting low-voltage lighting. This not only saves energy but also presents less of a risk when installing and handling them.
Proper fixture placement is crucial to prevent accidental overheating, which can damage the tree or even cause a fire. Never place lights too close to the trunk or branches, especially with spotlights that generate more heat. Aim for at least a foot of clearance from any part of the tree.
Avoid harming the tree while mounting fixtures by using straps or specially designed fasteners that don’t pierce bark or wood – every wound creates an entry point for pests and diseases. High-quality outdoor-rated cables and weatherproof junction boxes should be used for all electrical connections, and these should be well-insulated and hidden from sight where possible to minimize trip hazards and exposure to elements.
Understanding landscape lighting basics is vital before embarking on your project. It helps you make informed choices about light types best suited for your needs, appreciate how trees enhance landscape lighting designs markedly, and know what safety precautions are critical during installation.
Designing Landscape Lighting for Trees
Assessing Outdoor Space and Identifying Suitable Trees for Lighting
The first pivot point in planning your landscape lighting design is conducting a thorough assessment of your outdoor space and identifying the trees that would best be suited for lighting. This process involves a close examination of the trees themselves, noting their shapes, sizes, textures, and unique characteristics.
In assessing your space, aim to understand how each tree contributes to the overall aesthetic of the landscape. For example, older trees with gnarled branches can create dramatic silhouettes when lit from below, while younger trees with lush foliage can provide a softer glow. Furthermore, consider how these trees interact with other elements in your garden or yard, such as paths or water features.
The positioning of each tree is essential too; the term “locator tree” refers to those placed strategically around points of interest like seating areas or entryways. These are ideal candidates for lighting since they aid in navigation after sundown whilst enhancing visual appeal.
Determining the Style and Mood you Want To Set with your Tree Lights
Once you’ve identified suitable trees for lighting within your landscape, it’s time to establish the style and mood you wish to evoke via your lighting tactics. A plethora of different impressions can be conveyed through strategically installed tree lighting – a sense of serenity and tranquility; an atmosphere dense with mystery; an environment ripe with festivity – the choice is yours.
Consider soft washing lights on pathways leading up to large central trees, giving them an almost ethereal quality that evokes a peaceful ambiance. For those seeking a more dramatic effect, they may opt for techniques such as shadowing; by placing spotlights at the base of a tree casting upward into its foliage onto a wall behind it, they will create fantastical shapes that tease one’s imagination.
Color temperature also plays an important role in setting the mood. Warm lights with a yellow hue can make your outdoor space feel cozy and inviting, while cool lights with a bluer shade can create a modern, sophisticated look.
Selecting Proper Light Fixtures for Different Tree Types and Sizes
The selection of proper light fixtures is integral to creating compelling and polished landscape lighting design. Your light selection should be guided by tree types and sizes, as well as the desired mood you wish to set.
For larger trees, you might choose strong spotlights that highlight the tree’s grandeur or floodlights that illuminate broad areas of dense foliage. If installing these at ground level to cast upward illumination, ensure the light source is shielded so it doesn’t directly enter the viewer’s eyes – this technique is called ‘glare control’.
In contrast, smaller trees may benefit from more delicate fixtures such as well lights or path lights, which provide more reserved beams yet still emphasize distinctive features. Constantly bear in mind that each tree has its own unique identity; introducing lighting should augment this identity rather than overshadow it.
For instance, deciduous trees with open structures may best be served by back-lighting techniques expressing their layered depth, while coniferous species could dazzle when touched with front-facing spotlights emphasizing their dense nature.
Select fixtures that can withstand weather conditions typical to your area – all-weather materials such as brass or copper are robust choices – and always opt for LED bulbs due to their longevity and energy efficiency.
Preparing for Installation: Laying the Groundwork
Before plunging headlong into the installation process, taking time to prepare adequately will not only simplify your task but also ensure that it is done correctly and safely. Careful preparation allows for a smooth transition from concept to reality, turning your landscape lighting dreams into a beautiful nightscape.
Gathering Necessary Tools and Materials: Building Your Arsenal
To install landscape lighting in trees, it’s imperative to gather all necessary tools and materials. At the top of this list is a sturdy ladder tall enough to reach the desired height of installation safely.
You also need light fixtures specifically designed for outdoor use; these are typically weather-resistant and come in various styles to match your aesthetic preferences or achieve desired lighting effects. In addition, you’ll need electrical wiring suitable for outdoor use.
This includes wire rated for direct burial if you plan on tucking wires beneath the soil surface, as well as weatherproof wire connectors. Other essential tools include wire strippers, pliers, screwdrivers, a drill with various bits (including an auger bit if drilling through tree material), a hammer, and an electrical staple gun for securing wiring.
Understanding Electrical Requirements: Becoming Fluent in Electricalese
While installing landscape lighting might seem like a predominantly artistic endeavor, it also requires technical acumen. Particularly crucial is understanding the electrical requirements associated with outdoor lights.
Firstly, consider voltage drop – the reduction in electricity flow that takes place as electric current travels along the length of wire. Because low-voltage landscape lights usually operate on 12 volts (as opposed to 120 volts used by standard household lights), voltage drops can significantly dim your lights or cause uneven illumination across fixtures if not managed properly.
Secondly, ensure that your transformer is large enough to handle both present and potential future loads from all connected fixtures; it should never be loaded more than 80% of its maximum capacity. Install each light on a separate circuit to prevent overloading and ensure safety.
Pre-Installation Safety Measures: Prioritizing Prudence Over Peril
Before delving into the actual installation process, it’s critical to take certain pre-installation safety measures. Firstly, ensure that you have a clear understanding of your local electrical codes; many jurisdictions require outdoor electrical work to be done or inspected by a licensed electrician.
When drilling holes in trees for light fixtures or wiring, make sure not to harm the tree’s health – never drill into the trunk and avoid placing fixtures where falling branches might damage them. Also consider potential hazards like overhanging power lines or unstable tree branches when choosing locations for your lights.
Remember that you’ll be working with live electricity. Always turn off power at the source when working on electrical components and use ground fault circuit interrupter (GFCI) outlets for all outdoor electrical connections to protect against the risk of shock.
By diligently addressing these preparatory elements – gathering tools and materials, understanding electrical requirements, and implementing safety precautions – you lay a strong foundation upon which your landscape lighting project can successfully come together.
Step-by-Step Guide to Installing Lights in Trees
The Art of Positioning the Light Fixtures
The process of installing lights in trees begins with meticulous positioning of light fixtures. This task, while appearing mundane, is the linchpin around which the aesthetics and efficacy of your landscape lighting revolve.
The type and size of the tree, along with the desired effect, play a pivotal role in determining optimal positioning. For larger trees, you may want to consider a technique known as “moonlighting.” This involves fixing several fixtures high up in the tree branches and pointing them downward. This creates a dramatic moonlight effect as shadows dance on the ground below.
Conversely, for small or medium-sized trees, “uplighting” could be your method of choice. Place fixtures at ground level, aiming upwards to highlight unique features or create an inviting ambience.
Securing fixtures without damaging your verdant companions necessitates care and precision. Avoid nails or screws that pierce tree bark deeply; these can harm the tree’s health over time by opening it up to diseases or pests. Instead, opt for straps specifically designed for securing objects to trees; they’re available in most hardware stores.
Wiring Tree Lights: A Detailed Guide
Once you have fixed your light fixtures into position, it’s time for wiring – an undeniably crucial part of this elaborate endeavor. Begin by running a low-voltage wire from each fixture back towards the power source location (usually located near your house).

It’s advisable to loosely follow the contours of your landscape keeping wires concealed beneath soil or mulch where possible. You may need to splice additional lengths of wire if your original segment doesn’t reach all lights intended for connection. Remember that each splice should be made using waterproof connectors; moisture is an implacable foe when it comes to electrical connections.
Safety should be your guiding principle while handling electrical wires. Always switch off the power supply before touching any wiring, wear insulated gloves, and ensure that your hands are not wet. Bury the wires at least six inches underground to prevent accidental contact, especially in areas where children or pets frequent.
Connecting to the Power Source: Ensuring Safe and Reliable Operation
Now that your lights are positioned and wired, you need to connect them to your power source. This might be a transformer that takes standard household voltage (120V) and steps it down to 12V – a safer voltage for outdoor lighting. Follow manufacturer instructions closely when connecting; this can involve stripping wire ends, twisting them together with an existing wire from the transformer, and securing using a connector cap.
An integral part of this process is the employment of a ground fault circuit interrupter (GFCI) outlet for powering your transformer. A GFCI outlet is designed to automatically cut off electrical power in case it senses any irregularities such as potential short circuits or ground faults – scenarios you certainly don’t want in an outdoor setting soaked with natural elements.
After all connections have been made, it’s time for the moment of truth: switching on the power supply. If everything has been done correctly according to plan, you should now be able to enjoy your beautifully lighted trees – a testament to both nature’s beauty and human creativity.
Testing Newly Installed Tree Lights
Once you have completed the installation process, it’s critical to test each light to ensure they are functioning properly. Begin by turning on your power source and observing each of the installed fixtures. They should light up immediately upon power activation if everything has been connected correctly.
If a light does not turn on, first check its connection to the power source. It is possible that a wire may have come loose during installation or that an electrical connection was not properly made. Ensure all wires are securely attached and properly insulated.
If all connections seem secure, inspect the light fixture itself. The bulb may be faulty or incorrectly placed within its housing. Try replacing it with a new bulb, taking care not to touch the new bulb’s surface with your fingers, as this can shorten its lifespan significantly.
You should also check your circuit breaker or GFCI outlet if any lights fail to operate correctly. This could indicate an overload in your electrical system due to too many lights being added simultaneously. If this is the case, you would need to distribute your lighting load more evenly across multiple circuits. The goal is for all of your newly installed tree lights to shine brightly and consistently while adding beauty and functionality to your outdoor space.
Adjusting Light Positions for Optimal Effect
After testing the functionality of each light, it’s time for adjustments – a step that truly turns this project into an art form. Start by revisiting each fixture as soon as dusk falls; this will allow you to see their actual effect in low-light conditions much better than during daytime hours.
Examine how each light impacts surrounding areas and objects; remember that landscape lighting is intended primarily for highlighting features rather than providing general lighting. If a tree or feature appears overly bright compared with others in the vicinity, you might need to reposition the light or select a lower-wattage bulb.

Also, observe any unintended shadows being cast by your fixtures. You may need to adjust the light position upwards or downwards to eliminate errant shadows and achieve your desired lighting effect. Remember that shadows can add depth and interest; however, they should be deliberate and add to your overall design aesthetic.
Keep in mind that what looks good from one point of view may not look as appealing from another. Walk around your yard, taking in views from various angles, and make adjustments accordingly to create a cohesive and captivating lighting scheme.
Your adjustment period might take several days as you tweak each fixture’s placement until it casts just the right amount of light in exactly the right direction. Patience will pay off with an end result that enhances both beauty and safety within your outdoor space.
Conclusion: How to Install Landscape Lighting in Trees?
Installing landscape lighting in trees is undoubtedly one of the most rewarding home improvement projects you can undertake. Not only does it enhance your property’s aesthetics, but it also promotes security by lighting previously dim areas. The process might appear complex at first glance; however, with careful planning, necessary safety precautions, proper installation techniques, thorough testing, and meticulous adjustment of each light fixture’s positioning for optimal lighting effect, you will undoubtedly create an enchanting nightscape that beautifully showcases your trees while adding depth and dimension to your outdoor spaces at nightfall.
You may also be interested in the following posts: