Introduction to the Art of Roof Landscape Lighting
The advent of landscape lighting has revolutionized the aesthetics of outdoor spaces, adding an ethereal beauty to gardens, paths, and architectural structures after dusk. It is an art that combines strategic placement, proper light fixtures, and a keen eye for detailed design to create a breathtaking nighttime panorama.
Landscape lighting involves the use of outdoor illumination for the enhancement and purposes of safety, nighttime aesthetics, accessibility, recreation and sports, and social and event uses. The play of shadows against surfaces or the glow cascading on foliage adds depth and dimension to your property.
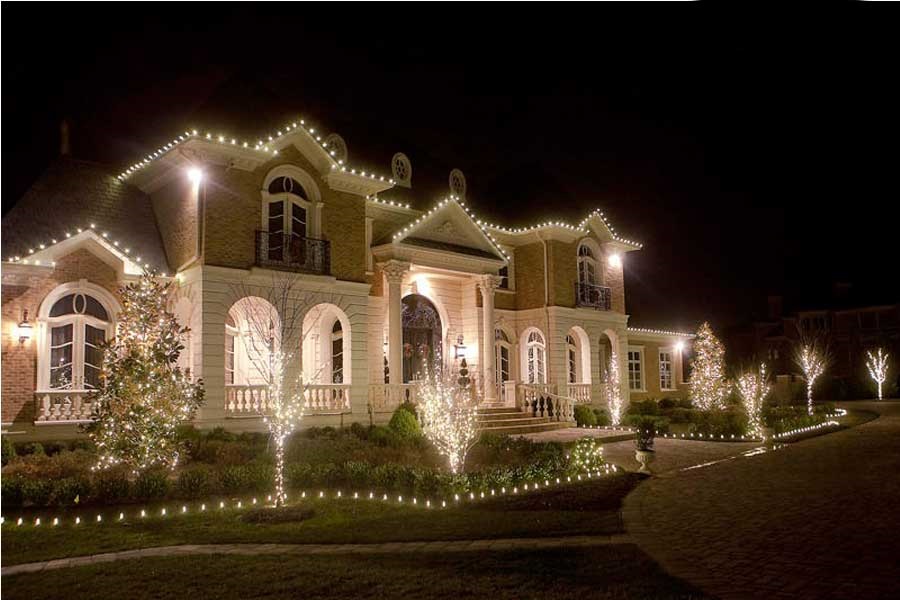
Roof landscape lighting’s role in architectural detailing is undeniable. Not only does it accentuate your home’s beautiful features but also outlines its silhouette against the dark night sky. It adds an additional layer of security by deterring potential intruders while ensuring safe navigation around your property.
The Luminous Edge: Importance & Benefits of Roof Landscape Lighting
Roof landscape lighting is the magical element that breathes life into architecture during the night hours. Its significance lies in how it elevates both form and function – enhancing visual appeal while providing practical benefits too.
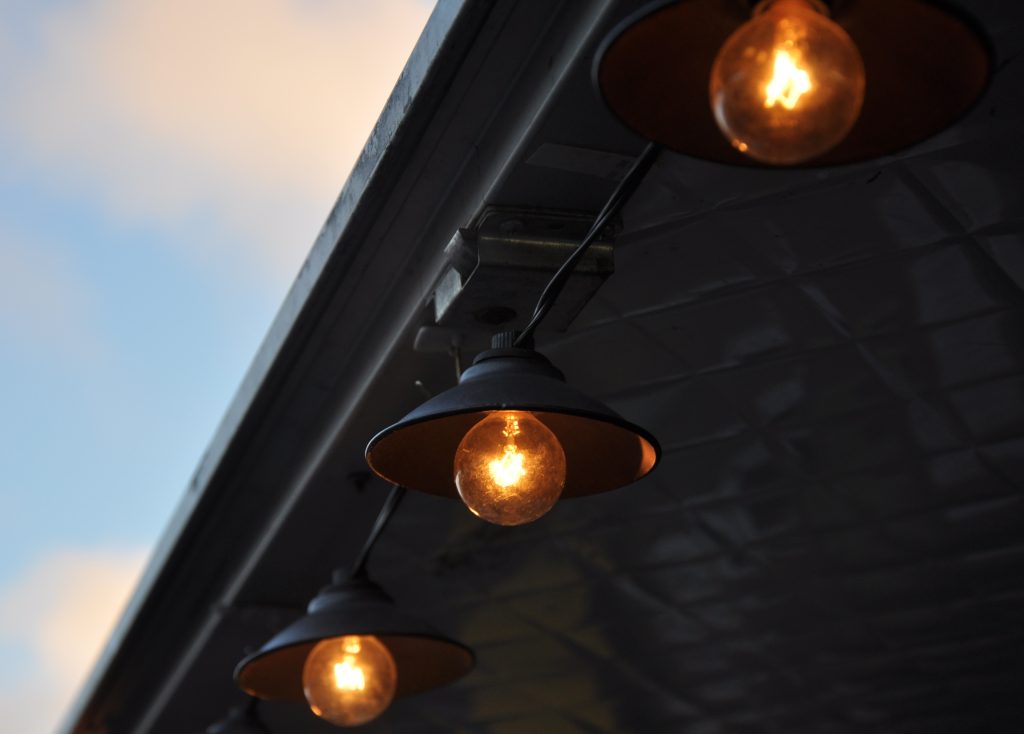
Firstly, roof lights help highlight architectural details that can often be overlooked in normal daylight conditions. Whether it’s highlighting a beautiful weather vane or bringing out textures from unique roofing materials like slate or cedar shakes, rooftop lights add depth and drama to these elements.
Secondly, this type of lighting contributes significantly towards overall security. A well-lit house appears inhabited even when you’re not at home, which often deters burglars from targeting such properties.
Thirdly, we cannot underestimate its role in safety measures as well, illuminating any potential tripping hazards on balcony areas or rooftop patios and ensuring you can comfortably navigate these spaces after sunset.
There’s an environmental aspect too, with many modern roof landscape lights now utilizing energy-efficient LED bulbs or even solar power, reducing your carbon footprint as well as your electricity bill.
Guided by Light: Safety Precautions and Necessary Tools
While the prospect of installing roof landscape lights may be exciting, it is also a task that demands careful planning and execution. Ensuring safety during installation is paramount.
Before starting the project, make sure to turn off all electric power sources connected to the lighting area. This will prevent accidental electrocution during installation.
It’s also essential to use a sturdy ladder with non-slip feet for safe access to the roof. Always wear work gloves to protect your hands when handling tools and light fixtures.
It’s recommended to work in pairs or groups for additional safety measures; you’ll have someone handy to pass tools or hold ladders steady where needed. Knowing what equipment you’ll need before starting will save both time and prevent unnecessary stress once you begin.
Essential items include light fixtures, screws (or other mounting hardware), drills, wire strippers, connectors, electrical tape, a voltage tester, and perhaps an extension lead for your power tools. It’s critical not just knowing how these tools function but also how best to handle them safely. If you’re unfamiliar with any necessary equipment, take time beforehand to familiarize yourself thoroughly, avoiding potential accidents during the installation process.
Understanding the Basics of Roof Landscape Lighting
An enlightened comprehension of the fundamentals of landscape lighting is vital to successfully achieving dynamic and aesthetically pleasing roof lighting. Landscape lighting consists of the strategic placement of lights to accentuate outdoor spaces, usually focused on highlighting noteworthy architectural or natural elements, enhancing safety, and creating a serene nighttime ambiance.
While it might appear simple in concept, landscape lighting is an art form that requires meticulous planning and understanding. It involves a thorough knowledge about the different types of lights, their power sources, placement techniques for optimal effects, and how these elements work together to create an enchanting overall effect. It’s essential to remember that successful landscape lighting design is not just about amount but quality.
An excessive number of lights can lead to harshness or glaring effects that detract from your home’s charm rather than enhancing it. In this section, we will delve into the basics of landscape lighting by discussing various types of lights suitable for roofs, exploring different power sources such as solar power or line voltage, and how best to place these lights for maximum effect.
Casting Light on Different Types of Landscape Lights Suitable for Roofs
Suitable roof landscape lights are primarily decided based on their purpose – whether they’re meant for ambient setting or spotlighting a particular structure. The most common types include spotlights, floodlights, and wall-wash fixtures.
Spotlights are versatile with their narrow beam spread, making them perfect for uplighting roof features such as gables or chimneys. Floodlights have wider beam spreads, making them ideal for general illumination across larger areas. Wall-wash fixtures provide a smooth gradient light wash over large vertical surfaces like walls or tall structures.
Apart from function-based selection criteria, aesthetic considerations also play a major role in choosing the right roof landscape lights. These might include the material and finish of the light fixture, its visual design, and how it complements the overall architectural style of your house.
It’s also crucial to consider durability given that these lights will be exposed to several weather elements. Therefore, it’s advisable to go for weatherproof and corrosion-resistant fixtures that promise long-term use without compromising on brightness or functionality.
Powering Up: Unraveling Solar, Low-Voltage, and Line Voltage Sources
The power source is an important consideration in landscape lighting as it impacts not just the operational cost but also the complexity of installation. The three commonly used power sources are solar, low-voltage electric, and line-voltage electric.
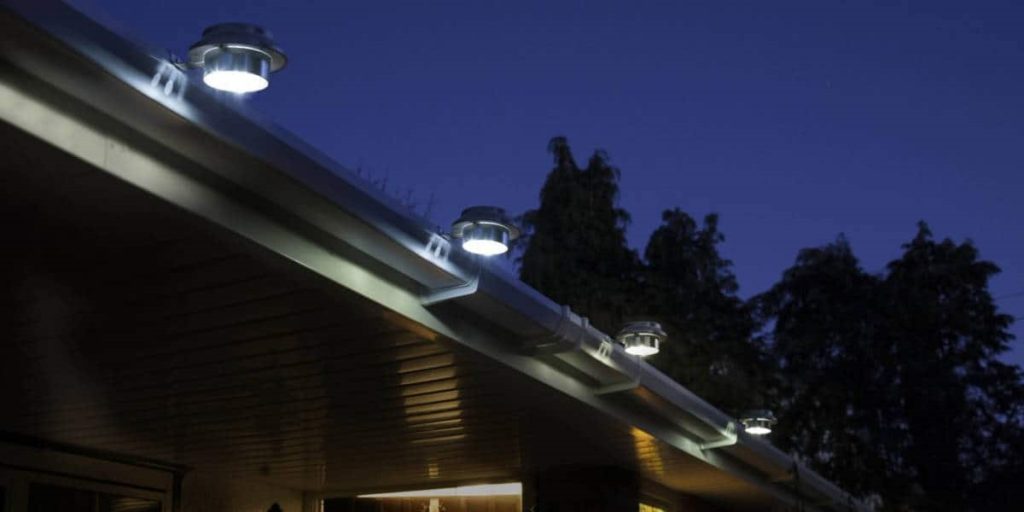
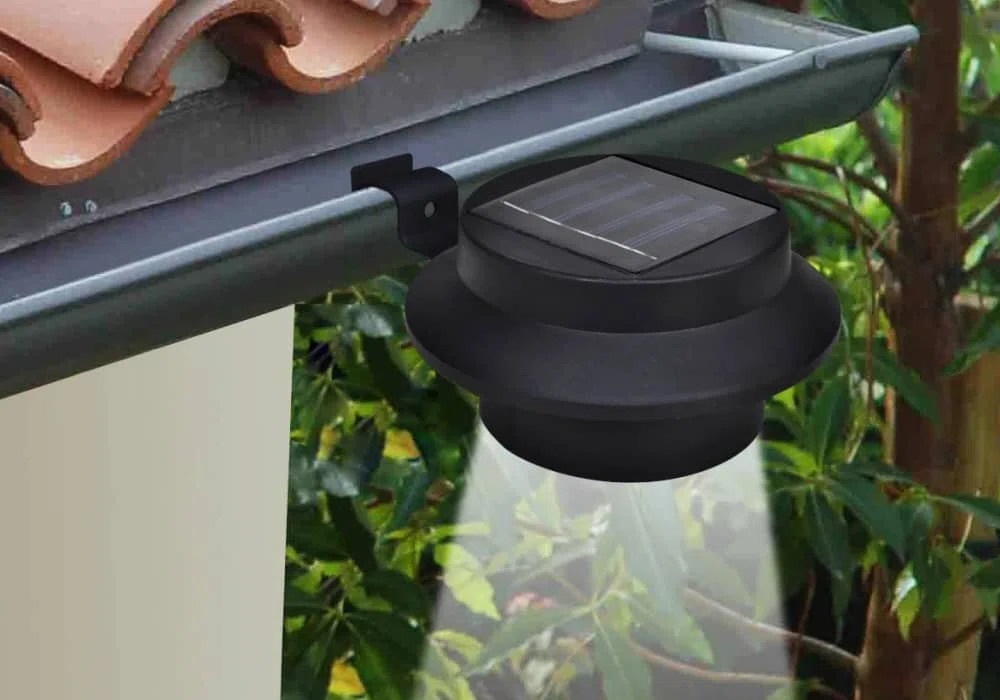
Solar-powered lights have been growing in popularity due to their environmentally friendly nature. They operate by harnessing sunlight through a photovoltaic cell during daylight hours, which is then stored in batteries to provide lighting after dark. This makes them an economical and green option, but their light output can sometimes be lower than electric options.
Low-voltage systems run on 12 volts – a significant step down from standard household voltage. This makes them safer to work with and allows for more energy-efficient operation. However, they require a transformer to reduce mains voltage down to 12 volts, which adds an extra step during installation.
Line voltage systems operate at 120 volts – the same as standard household outlets – offering robust lighting suitable for large-scale applications. While these offer excellent luminosity, they do require more careful installation due to their higher voltages.
Bright Ideas for Optimal Light Placement
The placement of roof landscape lights plays a pivotal role in enhancing both aesthetic appeal and functional safety aspects of your home’s exterior after dark. A common technique is uplighting, where lights are pointed upwards to highlight roof features like gables or eaves. This not only draws attention to these elements but also provides an illusion of height and grandeur.
Downlighting, on the other hand, involves placing lights high on the roof pointing downwards. This can simulate natural light, such as moonlight, for instance, and is ideal for creating gentle illuminations around entryways or pathways.
Cross-lighting involves using two or more lights to illuminate an object from different angles. This can be used effectively on roofs to create a balanced illumination, reducing harsh shadows and providing a three-dimensional effect.
The actual placement of these lights should be done so as not to directly hit the observer’s eyes, causing unnecessary glare. Also, strategic positioning can help avoid light pollution that might disturb neighbors or wildlife in the vicinity.
Roof Landscape Lighting Installation: A Pragmatic Approach to Lighting
Before launching into the installation of your landscape lighting, a comprehensive plan is crucial. The success of your project largely hinges on this preparatory stage. Embarking on your landscape lighting installation without a detailed plan would be tantamount to navigating uncharted waters with no compass or map.
Assessing Roof Structure and Material: The Foundation of Your Lighting Design
You must first assess the structure and material of your roof before commencing the installation. The type of roof you have, whether it’s a gable, hip, flat, or other style, will dictate the positioning and type of lights you can install. Furthermore, the material composition – be it metal, asphalt shingles, or clay tiles – will influence how your lights are affixed.
A careful assessment produces an understanding of any possible constraints or challenges that may arise during the installation process. For instance, clay tiles are prone to breakage when pierced with screws; hence, adhesive mounts could be utilized instead.
Conversely, metal roofs may require specific mounting brackets for secure placement. Remember that every roof has its own unique characteristics, which should be factored into planning stages – neglecting this could result in unnecessary complications down the line.
Sketching a Layout Plan: Blueprint to Exquisite Lighting
The next step in planning is sketching out a layout for your lighting setup. This blueprint doesn’t need artistic flair as its main purpose is functional – to guide you during installation.
Identifying Key Architectural Features to Highlight
In sketching your layout plan, identify key architectural features on and around your roof worth highlighting, such as eaves, dormers, or uniquely textured shingles. Highlighting these areas not only beautifies them but also enhances visibility at night, aiding safety precautions.
Ensuring Balanced Light Distribution
Another factor to consider in your layout sketch is the balance of light distribution. You need to strategically position the lights so that the lighting is evenly distributed over the entire roofscape. Overly concentrated or sparse lighting could distort visual perspective and diminish aesthetic appeal.
Considering Neighbors and Light Pollution
While sketching your blueprint, you must take into account your neighbors and potential light pollution. Glare from over-illuminated rooftops could cause discomfort or annoyance for neighbors and even contribute to wider environmental issues of urban light pollution.
Consequently, it’s essential to strike a balance with your lighting – sufficient enough to attain desired effects yet considerate enough not to cause undue inconvenience or environmental harm. Understanding these components before progressing further will create smoother sailing throughout this tutorial on How to Install Landscape Lighting on the Roof.
Choosing the Right Equipment
As we embark on this luminous journey, the selection of appropriate equipment is paramount to achieving a transcendent celestial display. The principal elements in the constellation of your roof landscape lighting are the lights themselves.
Spotlights are an excellent choice for accentuating architectural features, casting intense beams to highlight eaves, chimneys, or gables. Alternatively, floodlights provide broader illumination, making them ideal for areas where a more diffuse glow is desirable.
A noteworthy consideration herein lies in deciding on your power source. Solar-powered lights offer an eco-friendly solution that can be relatively simple to install given their lack of required wiring; however, their performance hinges heavily on sunlight availability.
Electric lights deliver consistent brightness irrespective of weather conditions but necessitate meticulous wiring and adherence to safety protocols. An assortment of requisite materials accompany your choice of lights and power source.
Appropriate outdoor-rated wiring is crucial for electrical systems, while mounting hardware will ensure secure attachment of lights to your roof structure. Depending upon personal preference and system complexity, a timer or controller may also prove beneficial in automating your light display.
Preparing for Installation
In prelude to the installation symphony, our overture entails thorough preparation underscored by an emphasis on safety measures. Donning personal protective equipment such as gloves and safety goggles is non-negotiable before embarking on this venture.
Meticulous accumulation of all required tools and materials prior to commencement will facilitate a smooth installation process. A checklist encompassing everything from drills and screwdrivers for mounting the lights to wire cutters and strippers for handling electrical wires can prove invaluable in this endeavor.
A Step-by-Step Installation Guide
The performance begins with mounting the lights onto the roof structure, drilling holes at predetermined locations for the mounting brackets, and ensuring to choose areas that can bear the weight of the light fixtures. Irrespective of the type of roofing material, it is crucial to secure lights using appropriate hardware that will resist weather-induced wear and tear over time.
Post-mounting, we shift our focus to running the wiring. Properly routing wires so as to avoid water ingress or physical damage is a nuanced task requiring patience and precision.
Should your system necessitate multiple lights, knowledge of connecting them in series or parallel becomes essential. The crescendo of our installation symphony is connecting our diligently wired lights to their power source.
If working with a solar system, this involves setting up your solar panel in an area receiving ample sunlight throughout the day. Conversely, electric systems require diligent electrical connections; employing an RCD (residual current device) for added safety would be prudent.
Post-Installation Tips
A curtain call on your installation does not signal an end but rather indicates a shift into maintenance mode. Immediate testing post-installation ensures all components are functioning optimally and interactions between different elements are harmonious.
Conclusion: How to Install Landscape Lighting on the Roof?
Installing landscape lighting on your roof may seem like a daunting task, yet with meticulous planning and careful execution, it can translate into an enriching DIY project. This celestial journey not only brightens your home but also instills a sense of accomplishment, casting light on abilities you never knew existed. So here’s to lighting up lives one roof at a time!
You may also be interested in the following posts: